• Our new ticketing site is now live! Using either this or the original site (both powered by TrainSplit) helps support the running of the forum with every ticket purchase! Find out more and ask any questions/give us feedback in this thread!

DCC fitting services

Status
Not open for further replies.

Peter C

Established Member
Joined
13 Oct 2018
Messages
4,613
Location
GWR land
Hello :)
Over the past couple of years, I've built up a fairly substantial model collection, with most of my engines being older Lima/Hornby DC designs. At the moment I run both DC and DCC (not at the same time) to allow me to run both types of engines but really I'd like to move away from this messy system and across to fully DCC. The only problem is my inability to hardwire a DCC decoder to a non-DCC-ready locomotive!
Is there anywhere I can send my engines to, pay for the fitting of a decoder (and the price of the decoder if not included in price of fitting), and then get back a fully-working DCC engine? Hattons don't fit DCC to engines retrospectively (they only offer this service when you buy models from them) and I don't really want to trawl the interwebs looking for tiny model shops which offer the service - essentially what I'm asking is, is there anyone would recommend which offers a DCC fitting service (obviously not free of charge) which would work with locos not purchased from them?

Thanks,

-Peter
 
Sponsor Post - registered members do not see these adverts; click here to register, or click here to log in
R

RailUK Forums

Iskra

Established Member
Joined
11 Jun 2014
Messages
8,956
Location
West Riding

These guys do it and they are excellent :)
 

Peter C

Established Member
Joined
13 Oct 2018
Messages
4,613
Location
GWR land

These guys do it and they are excellent :)
Ah brilliant - thanks a lot :)
I've given their site a quick look and they seem to fit what I asked for so that seems perfect.

-Peter
 

reddragon

Established Member
Joined
24 Mar 2016
Messages
3,192
Location
Churn (closed)
Hello :)
Over the past couple of years, I've built up a fairly substantial model collection, with most of my engines being older Lima/Hornby DC designs. At the moment I run both DC and DCC (not at the same time) to allow me to run both types of engines but really I'd like to move away from this messy system and across to fully DCC. The only problem is my inability to hardwire a DCC decoder to a non-DCC-ready locomotive!
Is there anywhere I can send my engines to, pay for the fitting of a decoder (and the price of the decoder if not included in price of fitting), and then get back a fully-working DCC engine? Hattons don't fit DCC to engines retrospectively (they only offer this service when you buy models from them) and I don't really want to trawl the interwebs looking for tiny model shops which offer the service - essentially what I'm asking is, is there anyone would recommend which offers a DCC fitting service (obviously not free of charge) which would work with locos not purchased from them?

Thanks,

-Peter

Peter you are close to Howes who do this! Most model shops have a repair man who will do it.

Honestly though, most Hornby are easy, Lima is a bit of soldering. Anything split chassis, older RR Hornby, Triang are not worth it.


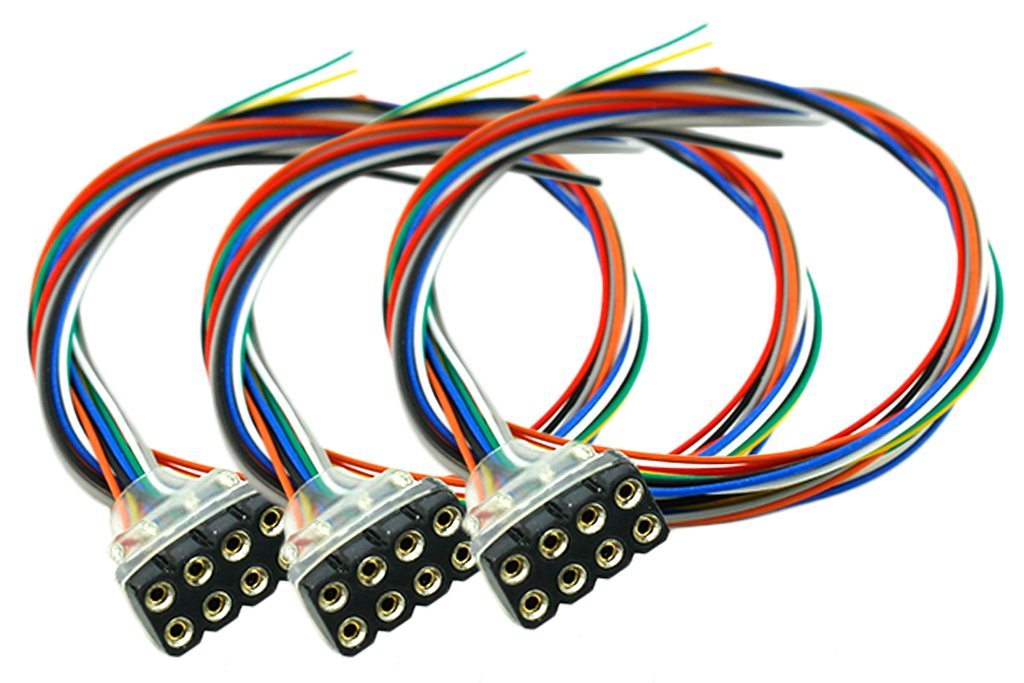
Old Hornby - buy a wiring harness, add the female Hornby plugs, if you cant solder crimp them on, then unplug the existing 2 wires and plug in the harness. The chip then just plugs in the socket!

connectors: -


and harness


So easy, try it on 37130

2 wires go to each end of short black wire, 1 to trailer pick up and 1 to other side of motor - remove suppressor
Really really simple & easy

replace black wire with

Motor left - grey 1
Rail left - black 4

Replace trailer pick up with

Motor right - Orange 1
Trailer - Red 8

NumberColourPurpose
1OrangeMotor RightMR
2YellowRear lightsLR
3GreenAUX1 F3
4BlackRail leftRL
5GreyMotor leftML
6WhiteFront lightsLF
7BlueCommon pos
8RedRail RightRR

Then plug in chip & you are away!
 
Last edited:

Cowley

Forum Staff
Staff Member
Global Moderator
Joined
15 Apr 2016
Messages
17,148
Location
Devon
You’ve explained that so well that I want to have a go. ;)
 

Peter C

Established Member
Joined
13 Oct 2018
Messages
4,613
Location
GWR land
Peter you are close to Howes who do this! Most model shops have a repair man who will do it.

Honestly though, most Hornby are easy, Lima is a bit of soldering. Anything split chassis, older RR Hornby, Triang are not worth it.


Old Hornby - buy a wiring harness, add the female Hornby plugs, if you cant solder crimp them on, then unplug the existing 2 wires and plug in the harness. The chip then just plugs in the socket!

connectors: -


and harness


So easy, try it on 37130

2 wires go to each end of short black wire, 1 to trailer pick up and 1 to other side of motor - remove suppressor
Really really simple & easy

replace black wire with

Motor left - grey 1
Rail left - black 4

Replace trailer pick up with

Motor right - Orange 1
Trailer - Red 8

NumberColourPurpose
1OrangeMotor RightMR
2YellowRear lightsLR
3GreenAUX1 F3
4BlackRail leftRL
5GreyMotor leftML
6WhiteFront lightsLF
7BlueCommon pos
8RedRail RightRR

Then plug in chip & you are away!
Thanks so much for explaining all that @reddragon - I'd heard people go on about harnesses and what have you but this is the first time I've seen them explained.
I won't be able to get those harnesses for a while as I'm currently looking to buy other things but I've got a couple of decoders which I could (hopefully) use when I get them. The harnesses you've linked to come in packs of three so I can get a few engines done at a time :)
What would the first items you linked to be for (the replacement wire terminals for ringfield motors)?
I've got a few Triang models which I'd like to DCC fit but if you say it's not worth it then I might look elsewhere for fitting them with DCC?

-Peter
 

reddragon

Established Member
Joined
24 Mar 2016
Messages
3,192
Location
Churn (closed)
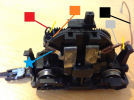
Peter I found this pic which explains it from RMweb

The harness has 8 wires of which you will need 4 on a basic loco. Red, Orange, grey, black

The current loco has 2 wires.

1 - A black one going from the red to orange terminal on this pic with female Hornby connectors on that connect to the spade connectors you can see here. You solder or crimp the new female connectors to 2 wires from the harness (red / Orange) and plug them in

2 - A brown one from the motor (grey) to the trailer pick up (black) in this picture. You solder or crimp the new female connectors to 2 wires from the harness (grey / Black) and plug them in

1610698137080.png

Don't worry that the pair of colours red/orange & black / grey are reversed on what I said earlier a it doesn't matter - you just put the loco down the other way or reverse it when coding the chip.

Remember to remove the suppressor!

You might have to tighten the connectors onto the motor and slightly spread the connectors onto the rail pick ups but otherwise super easy and the parts are really cheap!
 

Peter C

Established Member
Joined
13 Oct 2018
Messages
4,613
Location
GWR land
Peter I found this pic which explains it from RMweb

The harness has 8 wires of which you will need 4 on a basic loco. Red, Orange, grey, black

The current loco has 2 wires.

1 - A black one going from the red to orange terminal on this pic with female Hornby connectors on that connect to the spade connectors you can see here. You solder or crimp the new female connectors to 2 wires from the harness (red / Orange) and plug them in

2 - A brown one from the motor (grey) to the trailer pick up (black) in this picture. You solder or crimp the new female connectors to 2 wires from the harness (grey / Black) and plug them in

View attachment 88669

Don't worry that the pair of colours red/orange & black / grey are reversed on what I said earlier a it doesn't matter - you just put the loco down the other way or reverse it when coding the chip.

Remember to remove the suppressor!

You might have to tighten the connectors onto the motor and slightly spread the connectors onto the rail pick ups but otherwise super easy and the parts are really cheap!
Again - very helpful. Thanks very much :)
I'll have a go at this at some point in the future and let you know how it goes. Knowing my soldering it'll fall apart after a few seconds but we live and learn!

-Peter
 

reddragon

Established Member
Joined
24 Mar 2016
Messages
3,192
Location
Churn (closed)
Again - very helpful. Thanks very much :)
I'll have a go at this at some point in the future and let you know how it goes. Knowing my soldering it'll fall apart after a few seconds but we live and learn!

-Peter

Maybe its possible to order those harnesses with the connectors already soldered on??
 

Peter C

Established Member
Joined
13 Oct 2018
Messages
4,613
Location
GWR land
Maybe its possible to order those harnesses with the connectors already soldered on??
It might well be: I expect I probably could solder it all together as I've got a bit of experience with that sort of thing now though. A little lockdown project I think!

-Peter
 

reddragon

Established Member
Joined
24 Mar 2016
Messages
3,192
Location
Churn (closed)
It might well be: I expect I probably could solder it all together as I've got a bit of experience with that sort of thing now though. A little lockdown project I think!

-Peter

The good thing here is that you do it away from a chip or loco so the risk is minimal. Forgot to mention - a bit of heat shrink around the exposed cables or insulation tape is good too
 

Peter C

Established Member
Joined
13 Oct 2018
Messages
4,613
Location
GWR land
The good thing here is that you do it away from a chip or loco so the risk is minimal. Forgot to mention - a bit of heat shrink around the exposed cables or insulation tape is good too
Ah yes - I hadn't thought of that. I need to get some of that heat shrink stuff; looks to be easier to use than electrical tape!

-Peter
 

Peter C

Established Member
Joined
13 Oct 2018
Messages
4,613
Location
GWR land
Super easy, you just lightly use the side of the soldering iron and it shrinks!
That's what I'd seen online, yep :) I watch (/have watched) quite a few videos of people restoring old computers and the like on the interwebs so I've got an idea of how not to break everything - but watch this space!

-Peter
 

SCH117X

Established Member
Joined
27 Nov 2015
Messages
1,790
Again - very helpful. Thanks very much :)
I'll have a go at this at some point in the future and let you know how it goes. Knowing my soldering it'll fall apart after a few seconds but we live and learn!
Electrical soldering is different to metal soldering which is where a lot of people go wrong. You need solder with flux in it and the soldering iron is applied to the joint and then the solder - practice on some lengths of wire. Importantly once the iron is removed the soldered joint must be let to cool before anything is moved otherwise a dry joint will occur which will not conduct - you can tell a good joint as it will be shiny whereas a dry joint will look dull.
 

Peter C

Established Member
Joined
13 Oct 2018
Messages
4,613
Location
GWR land
Electrical soldering is different to metal soldering which is where a lot of people go wrong. You need solder with flux in it and the soldering iron is applied to the joint and then the solder - practice on some lengths of wire. Importantly once the iron is removed the soldered joint must be let to cool before anything is moved otherwise a dry joint will occur which will not conduct - you can tell a good joint as it will be shiny whereas a dry joint will look dull.
Ah - thanks very much for the explanation. That'll be where my soldering went wrong before; I'll try again at some point and see what I can do. All of my soldering joints seem to have been dry joints.

-Peter

EDIT: For anyone asking the same question, Hattons offer a DCC-fitting service in non-coronavirus times. https://www.hattons.co.uk/dccfitting I think this may be the route I'll go down when it's open again as Hattons have proved their good quality in the past.
 
Last edited:

reddragon

Established Member
Joined
24 Mar 2016
Messages
3,192
Location
Churn (closed)
When I got my DCC ready Hattons 66, I got with it a legomanbiffa sound decoder.

Easy I thought, err nope!

1 - there is no way possible to remove the body without snagging the steps at the doors - grrr
2 - Yup, chip plugged in :)
3 - Speaker . . . . err . . . remove the wires to one end, open up space and fit speaker . . OK could do that with some time
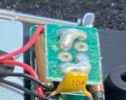
4 - to connect speaker solder wires onto pair of pin sized solder points on main board - Arrrgghh
5 - Await model shop reopening & get it done there!
 

Iskra

Established Member
Joined
11 Jun 2014
Messages
8,956
Location
West Riding
I’ve got in to the tender on Bachmann Standard 2 Tender Loco. Is someone able to advise me what I do next please?6ECC6F9E-6CD2-47E9-9BA0-751E9BEDA093.jpeg
 

reddragon

Established Member
Joined
24 Mar 2016
Messages
3,192
Location
Churn (closed)
If that is a blanking plate, 1611169509535.png unplug it and plug in the decoder making sure the arrow / 1s line up with orange

Be very careful not tp bend the pins!
 

Iskra

Established Member
Joined
11 Jun 2014
Messages
8,956
Location
West Riding
If that is a blanking plate, View attachment 89021 unplug it and plug in the decoder making sure the arrow / 1s line up with orange

Be very careful not tp bend the pins!
Thanks for your help. I watched some youtube videos too and I still didn't succeed. The pin I was putting in had 8 pins, but the one I pulled out had 6, so I don't know if 2 snapped off and are stuck in the holes or something, but I gave up, re-inserted the blanking pin and that loco will be staying DC. A very frustrating 30mins.
 

reddragon

Established Member
Joined
24 Mar 2016
Messages
3,192
Location
Churn (closed)
Thanks for your help. I watched some youtube videos too and I still didn't succeed. The pin I was putting in had 8 pins, but the one I pulled out had 6, so I don't know if 2 snapped off and are stuck in the holes or something, but I gave up, re-inserted the blanking pin and that loco will be staying DC. A very frustrating 30mins.
There is such a thing as a 6 pin chip but Hattons says: -

Bachmann Branchline 32-829
OO Gauge (1:76 Scale)
Class 2MT Ivatt 2-6-0 46426 in BR lined black with late crest
DCC Ready. 8-pin socket

Takes pics and share, I've had DCC conversions that take weeks to succeed on!
 

Iskra

Established Member
Joined
11 Jun 2014
Messages
8,956
Location
West Riding
There is such a thing as a 6 pin chip but Hattons says: -

Bachmann Branchline 32-829
OO Gauge (1:76 Scale)
Class 2MT Ivatt 2-6-0 46426 in BR lined black with late crest
DCC Ready. 8-pin socket

Takes pics and share, I've had DCC conversions that take weeks to succeed on!
Yeah, it looked like an 8-pin socket too. Maybe the pins weren't quite lined up right.

Ah, well that's good to hear and reassuring.

I've re-assembled the loco now, so that one has been shelved for a day when I have more patience. Thanks for your help :)
 
Status
Not open for further replies.

Top